How to Access Inventory
- On the top toolbar, click Organization.
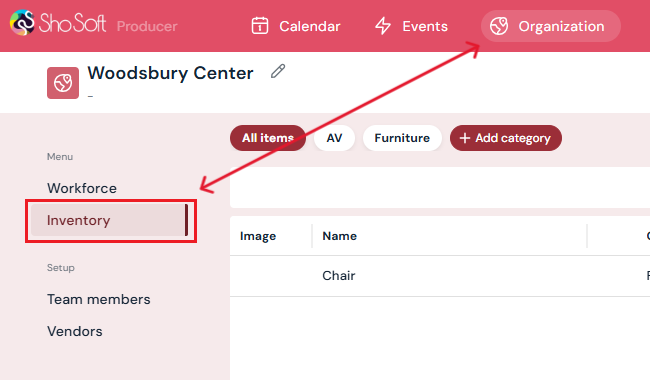
- In the left-hand menu, select Inventory.
- The Inventory page will open, showing any existing entries in chart form.
Two Ways to Add Inventory
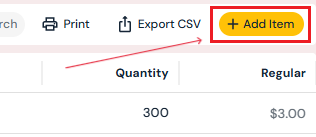
1. Through the Pop-Up Window
- Click the yellow Add Item button (top right corner).
- Enter Item Details:
- Name (e.g., Chair, Table, Projector)
- Optional: Upload an image
- Pick a Category (e.g., Furniture, AV, Food) from the dropdown (to add more categories see how to add/edit categories)
- Pick an Inventory Type: Reusable or Consumable
- Optional: Assign a Vendor (only vendors added through the Vendors tab will appear in the dropdown - see how to add a new Vendor)
- Optional: Add notes in the Description field

- Name (e.g., Chair, Table, Projector)
- Click Next.
- Enter Product Information:
- Number of items available
- Optional: Stock Keeping Unit (SKU), Universal Product Code (UPC)
- Rate per item (as charged by the vendor or your organization)
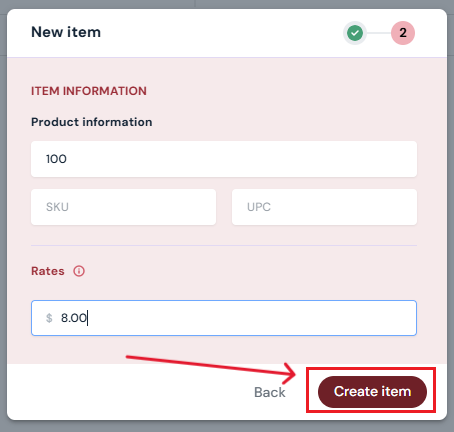
- Number of items available
- Click Create Item.
- The new item will appear in the Inventory chart.
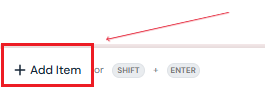
2. Directly in the Chart
- At the bottom of the chart, click Add Item or press Shift + Enter.
- A blank row will appear:
- Enter the name of the item.
- Pick a Category (e.g., Furniture, AV, Food) from the dropdown (to add more categories see how to add/edit categories)
- Optional: Assign a Vendor(only vendors added through the Vendors tab will appear in the dropdown - see how to add a new Vendor)
- Optional: Add notes.
- Enter quantity available.
- Enter Rate per item (as charged by the vendor or your organization)
- Enter the name of the item.
- Click the ✔ to save, or X to cancel.
Note: To add advanced details (SKU, UPC, consumable/reusable, vendor assignment, or images), use the pop-up window method (Method 1 listed above).
How to Edit or Delete an Inventory Item
- Hover over the row of the item you want to change.
- Click the three-dot menu next to the item name.
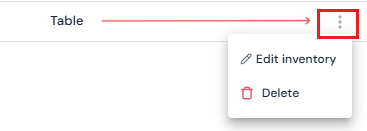
- Select Edit or Delete.
- Edit an Inventory Item:
- Update details in the pop-up.
- Click Save Changes to confirm.
- Or click Delete to remove the item entirely.
- Update details in the pop-up.
- Delete an Inventory Item:
- Confirm by clicking Yes, Delete in the pop-up.
- Confirm by clicking Yes, Delete in the pop-up.
Tip: If edits or additions do not appear immediately, refresh the page to view updates.
Next Steps
See how to Add/Edit/Delete Workforce for producers
See how to Add/Edit/Delete Vendors for producers
See how to Add/Edit/Delete Team Members for producers